Skip to content


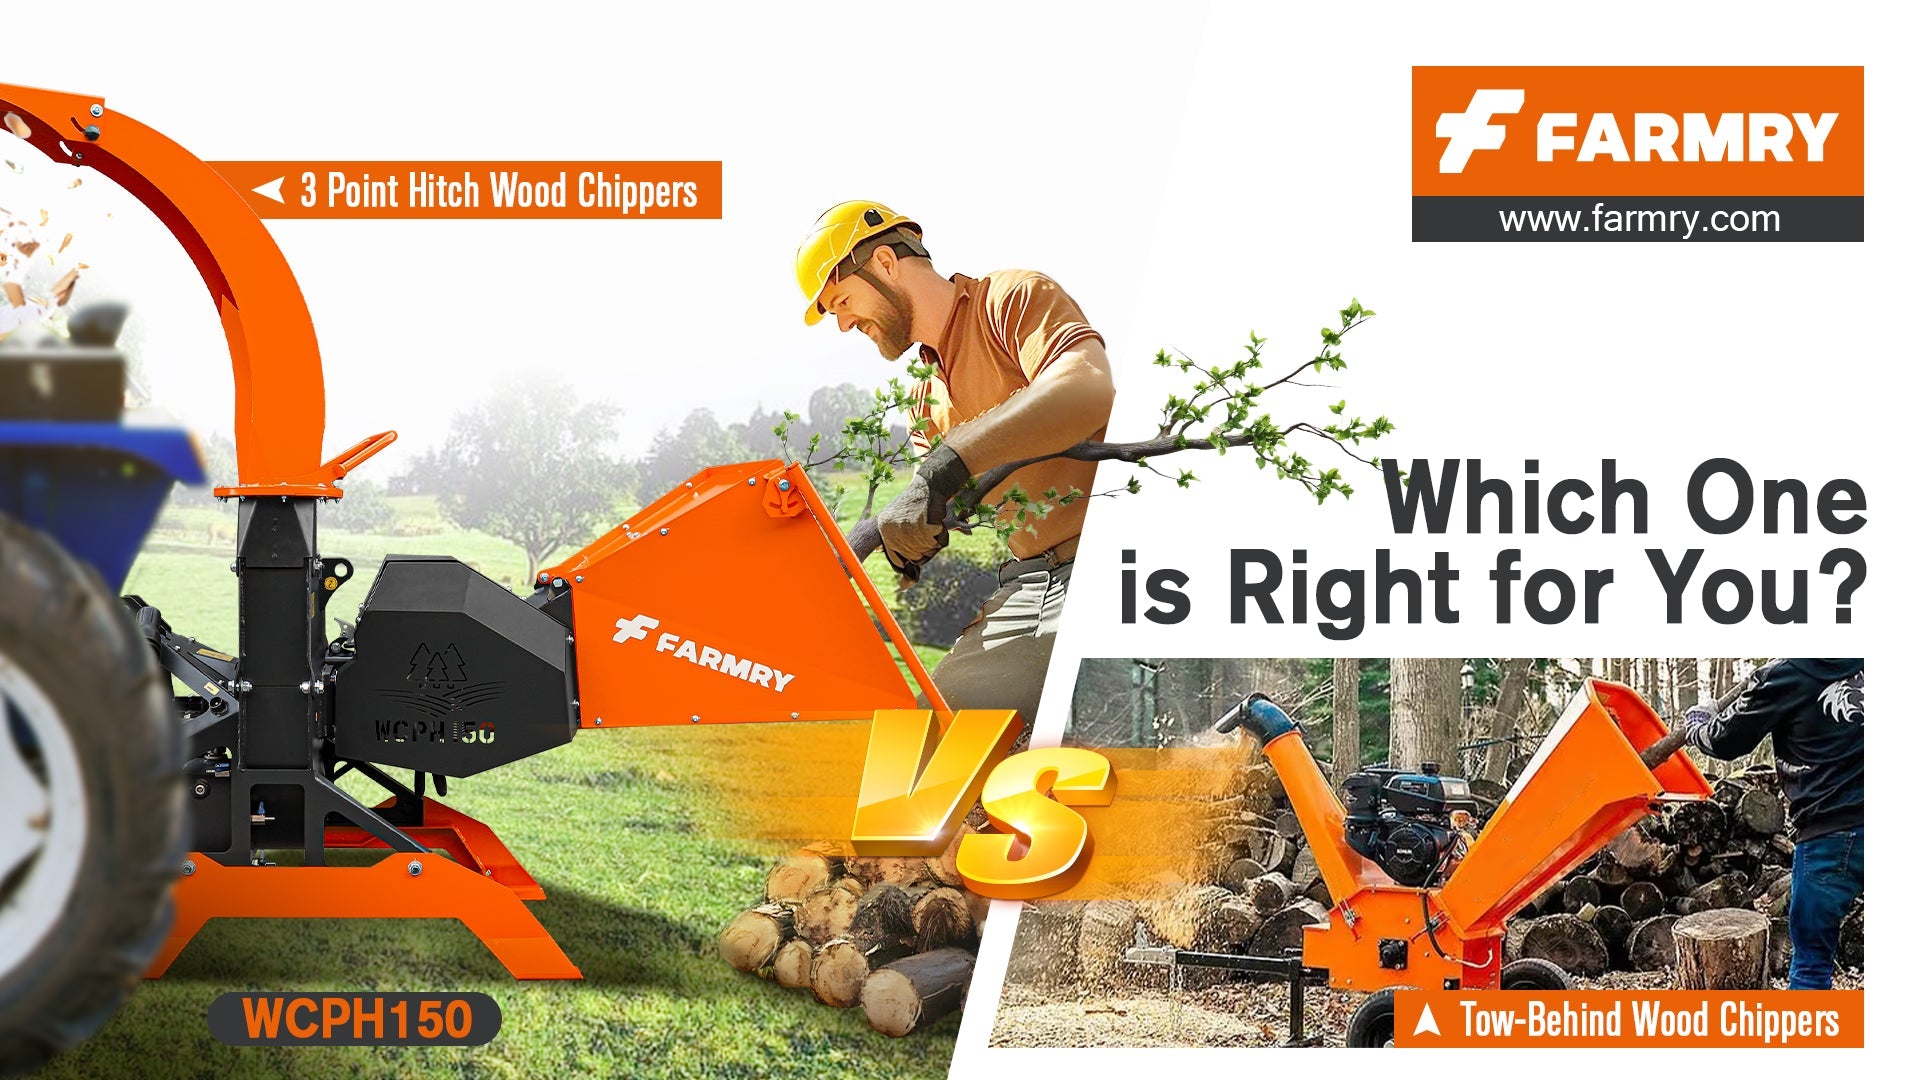
How to Mount a Wood Chipper for 3-Point Hitch
 How to Mount a Wood Chipper for 3-Point Hitch
When it comes to transforming massive piles of branches, brush, and limbs into usable mulch or manageable chips, few tools are as powerful and efficient as a PTO wood chipper mounted to a 3-point hitch. At Farmry, we provide high-performance, durable, and quick hitch compatible wood chippers designed to help you tackle your most stubborn yard waste with ease.
Whether you're a weekend warrior maintaining a small plot, a homesteader clearing storm debris, or a professional landscaper managing property cleanups, mounting your Farmry wood chipper properly is the first step toward efficient, safe, and productive chipping. In this in-depth guide, we’ll walk you through:
-
Understanding your 3-point hitch and PTO connection
-
Safety tips and specifications
-
Mounting your chipper step by step
-
Key Farmry product features
-
Troubleshooting tips
Let’s dive into the process of how to mount a wood chipper on a 3-point hitch using Farmry equipment.
Understanding the 3-Point Hitch System
The 3-point hitch system is a standard on most tractors and is the go-to method for attaching heavy-duty implements like wood chippers. It consists of:
-
Two lower lift arms – These connect to the lower points of the chipper.
-
One top link – This connects to the upper center of the chipper, creating a triangle for stability.
Most Farmry PTO wood chippers are quick hitch compatible, making this process even more streamlined.
Pro Tip: Ensure your chipper is compatible with Category 1 or 2 3-point hitches, depending on your tractor. Most Farmry models support Category 1.
Safety First: What to Know Before You Begin
Mounting and operating a wood chipper involves moving parts, sharp chipper blades, and a powerful flywheel. Here are safety tips before you start:
-
Always read the operator’s manual.
-
Wear safety gloves, goggles, ear protection, and steel-toe boots.
-
Ensure your tractor’s PTO horsepower (HP) matches the chipper’s required power.
-
Never allow anyone near the infeed chute, rotor, or feed roller while operating.
Tools You’ll Need
-
Adjustable wrench or socket set
-
PTO shaft (usually included with Farmry chipper)
-
Shear pin or slip clutch (depending on model)
-
Grease gun for lubrication
-
Hydraulic fluid (for hydraulic infeed models)
Step-by-Step: How to Mount a Wood Chipper on a 3-Point Hitch
Step 1: Position the Tractor and Chipper
-
Park your tractor on a level surface.
-
Make sure the chipper is upright on a flat area.
-
If it’s a Farmry self feeding chipper, it’s easier to maneuver since it doesn’t require a hydraulic hookup.
Step 2: Align the Lower Lift Arms
-
Back up slowly until your tractor’s lower lift arms are aligned with the chipper’s mounting points.
-
Slide the lift arms onto the pins of the chipper and secure them using lynch pins or clips.
Step 3: Attach the Top Link
-
Adjust the top link until it lines up with the chipper’s top mount.
-
Insert the pin and lock it in place.
-
This secures the 3-point hitch triangle.
Step 4: Connect the PTO Shaft
-
Match the PTO shaft with your tractor’s PTO stub.
-
Slide the shaft in and secure it with the locking collar.
-
Ensure it has the proper length—if it’s too long or short, you could damage the shaft or flywheel.
Farmry Tip: All Farmry chippers include a properly sized PTO shaft with shear pin or slip clutch protection, depending on the model.
Step 5: Hydraulic Connections (If Applicable)
For hydraulic infeed models:
-
Connect the hydraulic hoses to your tractor’s auxiliary ports.
-
Check for leaks and make sure the hydraulic pump and feed roller respond when tested.
Step 6: Final Checks
-
Test the 3-point lift system.
-
Ensure the chipper is level and stable.
-
Double-check all connections, especially the infeed chute, PTO shaft, and blades.
-
Engage the PTO briefly and test the rotation of the rotor and flywheel.
Farmry’s Wood Chipper Features: What Sets Us Apart
Heavy-Duty Rotor
Our rotor designs spin at high speed and torque to handle branches, limbs, and even tough tree debris. The balanced weight ensures smooth chipping with minimal vibration.
Reversible Blades
Each chipper includes reversible blades to double the lifespan. When one side dulls, simply flip them.
Hydraulic Infeed System
Some models offer hydraulic infeed with variable feed roller speed. Ideal for uniform chipping of large-diameter brush and wood.
Self Feeding Models
Our self feeding chippers use gravity and rotor momentum to pull wood into the infeed chute without needing hydraulics.
Quick Hitch Compatible
No more struggling with attachments. All Farmry wood chippers are designed to work with most quick hitch systems for fast mounting and removal.
Maintenance Tips After Mounting
Proper maintenance ensures long life and consistent performance:
-
Grease fittings regularly on the rotor and infeed roller.
-
Check shear pin or slip clutch for wear after each heavy use.
-
Replace chipper blades or sharpen them every 8-12 hours of usage.
-
Clean infeed chute, rotor housing, and hydraulic lines after each job.
-
Inspect flywheel and feed system for debris.
Frequently Asked Questions
What size tractor do I need for a Farmry PTO chipper?
Most models require a PTO rating between 15 and 60 HP, depending on the chipper’s capacity. Always check the specifications on the product page.
Can I chip fresh green limbs?
Yes! Our chippers are capable of chipping both dry and green branches. Keep blades sharp for best results.
Do you sell replacement parts?
Absolutely. We stock a full line of replacement parts, including blades, shear pins, and even entire infeed roller assemblies.
Farmry Product Highlight: Top PTO Wood Chippers
Farmry 6" Hydraulic Category 1 3-Point PTO Wood Chipper for Tractors up to 75 HP – PTO Shaft Included WCPH150
-
Handles branches up to 8" diameter
-
Includes reversible blades, shear pin PTO, and quick hitch compatible design
Farmry 5” 3 Point PTO Wood Chipper For Tractors Up To 45 HP, PTO Shaft Included WCAP130
-
Self feeding design, ideal for limbs and light brush
-
Lightweight equipment with durable steel infeed chute
Final Thoughts
Mounting a wood chipper on a 3-point hitch may seem complex at first, but with proper safety measures, knowledge of your equipment, and Farmry's quality chippers, the process becomes fast and manageable. Our lineup of PTO wood chippers, whether self feeding or hydraulic, is engineered for power, durability, and user-friendly performance.
With Farmry, you're not just investing in a machine—you’re investing in efficiency, safety, and long-term productivity on your land.
Ready to turn piles of brush, limbs, and branches into valuable mulch? Explore our full collection of Farmry PTO wood chippers here.