Skip to content



How to Mow Hay With a Disc Mower | Do You Know
Related Farmry resources: Shop Farmry Disc Mowers | What Size Hay Mower Fits a Small Tractor? | Choosing the Right Disc Mower | Disc Mower vs. Discbine
A disc mower can make a hay field look easy—until you look back and find an uncut strip down the middle, ragged grass stems, dirt mixed into the swath, or heavy hay bunched behind the cutter bar.
Knowing how to mow hay with a disc mower is less about simply pulling the machine across the field and more about keeping several things working together: sharp knives, correct PTO speed, sensible cutting height, consistent ground speed, enough overlap, and a mowing pattern that helps the crop dry.
Get those details right and a disc mower is a fast, efficient way to cut grass hay, alfalfa, and other forage. Get them wrong and driving faster usually makes the problem worse.
The Short Answer
To mow hay efficiently with a disc mower, inspect and grease the machine, verify tractor and PTO compatibility, set an appropriate stubble height for the crop, clear field hazards, bring the mower to its specified PTO speed, and then maintain a steady ground speed while slightly overlapping each pass. Adjust your pace for heavy or tangled hay rather than allowing tractor RPM to fall.
After cutting, leave the forage in a wide, loose swath whenever conditions and equipment allow. That exposes more crop to sunlight and airflow and can shorten the path from standing forage to properly cured dry hay. University Extension guidance generally recommends avoiding unnecessarily low cutting heights and maximizing swath width where rapid drying is the goal.
And one safety rule overrides every productivity tip in this guide: never inspect knives, clear tangled crop, or approach rotating components while the machine is operating. Stop, disengage the PTO, shut the tractor down, remove the key, and wait for every component to stop moving.
How a Disc Mower Actually Cuts Hay
A disc mower uses multiple rapidly rotating discs positioned along a cutter bar. Each disc carries free-swinging knives or blades. At operating speed, the combination of high rotational speed and knife momentum gives the mower its fast slicing action.
That design explains why disc mowers can cover ground quickly compared with older reciprocating sickle-bar systems. It also explains why PTO speed and knife condition matter so much. If knife speed falls because the tractor is lugging, or if dull knives are tearing rather than slicing the forage, the quality of the cut can deteriorate.
A plain disc mower's primary job is cutting. It does not automatically condition the crop.
A mower conditioner adds another operation after cutting. Roll or impeller conditioning damages or cracks the stems so moisture can escape more quickly. Many mower-conditioners also use forming shields or vanes to influence the discharge pattern or windrow formation. Penn State notes that conditioning rolls are specifically intended to help hay dry more quickly.
|
Equipment |
What it does |
Where it makes sense |
|---|---|---|
|
Disc mower |
Cuts forage with rapidly rotating discs and knives |
Fast cutting, grass hay, straightforward hay systems |
|
Mower conditioner |
Cuts and conditions the crop in one pass |
Heavy hay, stemmy forage, alfalfa, tighter drying windows |
|
Disc mower + separate tedder/rake |
Cuts first, then manages drying and windrow formation separately |
Smaller farms that already own separate hay equipment |
For someone cutting only a few acres of grass hay in dependable weather, a plain disc mower may be all that is needed. Where drying time constantly determines whether hay gets baled before rain, conditioning becomes much more valuable. Farmry’s own disc mower versus discbine guide makes the same core distinction: the disc mower cuts, while the conditioned system adds crop conditioning.
How to Mow Hay With a Disc Mower, Step by Step
-
Prepare the mower before entering the hay field. Inspect every knife for excessive wear, bends, cracks, or damage. Check that knives are correctly installed and able to move as designed. Examine the discs, guards, protective curtains, PTO driveline and shielding. Grease the machine at the points and intervals specified in its manual. Inspect hydraulic hoses for visible abrasion, leaks, poor routing, or damaged couplers. The goal is to find the problem in the yard rather than halfway through a good weather window.
-
Walk or scout the field before cutting. Rocks, wire, branches, old fence posts, holes, irrigation equipment and other hidden objects can turn into equipment damage or thrown-object hazards. Pay particular attention to outside edges, gateways, fence lines and areas where weeds or grass hide debris. A field that was clean during the previous hay cut is not automatically clean today.
-
Set cutting height for the crop, not for maximum yield in one pass. Cutting extremely close to the ground may seem like an easy way to collect more hay, but it can increase soil contamination and compromise regrowth or stand longevity. Forage type matters, so use the mower adjustment together with crop-specific agronomic guidance rather than automatically running the cutter bar as low as it will go.
-
Bring the mower up to the manufacturer-specified PTO speed. Do not improvise PTO speed in an attempt to make the discs spin faster. The mower's gearbox, driveline and cutting system are designed around a particular input speed. Current Farmry DHM-series disc mower specifications, for example, use a 540 RPM PTO and turn the cutting discs considerably faster through the gearbox.
-
Build ground speed only after the cutter is running correctly. Once the discs are at operating speed, move forward smoothly and watch the cut behind you. The correct speed is the fastest pace at which the tractor can maintain PTO speed while the mower leaves an even, clean stubble. Heavy hay, lodged grass, tangled crop, rough ground and slopes are reasons to slow the tractor—not reasons to reduce proper cutter speed.
-
Overlap enough to eliminate uncut strips. A practical starting point is roughly 5–10% of mower width, then adjust according to turns, field shape and terrain. Too little overlap leaves green ribbons of uncut hay. Too much overlap wastes effective cutting width and adds unnecessary passes.
-
Use a simple pattern that keeps the mower full without making awkward turns. Many operators open the outside edge of the hay field and then work in progressively smaller rounds, while others use long back-and-forth passes once adequate headlands are available. The exact pattern matters less than avoiding missed strips, excessive sharp turns and repeated travel over cut hay. Watch what the cutter is doing rather than blindly following the previous tire track.
-
Check the result before mowing the entire field. After the first few passes, inspect stubble height, the cut surface, swath placement and missed forage—but only after following the complete shutdown procedure. A few minutes of adjustment early can save an entire field of poor cutting.
What Cutting Height Is Right for Grass Hay and Alfalfa?
There is no single cutting height that is correct for every hay field.
Current Extension recommendations illustrate why. University of Maryland guidance recommends leaving approximately 2–3 inches for alfalfa and about 4 inches for cool-season grasses, while Penn State lists 2 inches as a minimum for alfalfa or clover, about 3 inches for established cool-season grass production, and roughly 2.5–3 inches for common mixed-stand situations. Local climate, forage species, cutting frequency and stand condition still matter.
|
Hay type |
Practical starting range |
Why |
|---|---|---|
|
Alfalfa or clover |
About 2–3 in. |
Balances harvest with crown protection, regrowth and reduced soil contamination |
|
Cool-season grass hay |
About 3–4 in. |
Preserves more stem base and supports stand persistence |
|
Mixed grass/alfalfa |
About 2.5–3+ in. |
Manage primarily for the species you want to retain |
|
Rough, uneven or dirty ground |
Raise the cut |
Helps keep soil, stones and field debris out of the forage |
The easiest field check is consistency. Stop safely and look across several passes. Is the stubble fairly uniform? Is the cutter occasionally scalping high spots? Is dirt showing in the cut crop? Are some plants being torn or pushed rather than cleanly severed?
If the mower is repeatedly scraping the ground, the setting is too aggressive even if the nominal cutting-height number looks acceptable.
Stubble also holds the fresh swath above the ground, improving airflow underneath it. That can matter nearly as much as the extra fraction of an inch of forage you might gain by cutting lower.
How Fast Should You Drive a Disc Mower?
There is no useful universal answer such as “always mow at 8 mph.”
Your mower, tractor horsepower, cutter width, crop density, ground condition, slope and operator visibility all change the practical speed.
For perspective, Farmry's current DHM7 specifications list a 540 RPM PTO, 81.4-inch cutting width and 6–10 mph working-speed range. That is a specification for that particular machine, not permission to run every disc mower at 10 mph.
The better rule is:
Maintain the mower's required PTO speed and adjust travel speed to the crop.
In light grass hay on smooth ground, that may mean fairly fast cutting. Hit heavy hay or a tangled section and you should expect to pull the ground speed back. If tractor RPM drops badly, the mower begins leaving a ragged cut, or crop starts bunching, you are moving too fast for those conditions.
A disc mower's speed advantage only saves time when it is still producing a clean cut.
Why Sharp Knives Matter More Than Many Farmers Expect
A worn knife does not simply make the machine “a little less sharp.”
Instead of slicing through grass stems, a dull or damaged knife can tear them. That can leave ragged stubble, increase resistance and make the tractor work harder. Uneven or damaged knives may also contribute to vibration or poor cutting.
Inspecting knives regularly is therefore one of the cheapest adjustments you can make.
Pay attention to how they are installed as well. On machines where knife orientation or disc rotation matters, an incorrectly installed knife can produce an obvious strip of poorly cut forage even when the knife itself is new.
The operator's manual should always control replacement procedure, orientation, torque requirements and wear limits. Penn State specifically advises regular inspection of mower knives and replacement of damaged or missing components before operation.
Why Is My Disc Mower Leaving Uncut Hay?
Poor cutting problems usually fall into three categories: setup, field conditions, or wear.
|
What you see |
Likely cause |
What to check |
|---|---|---|
|
Uncut strip at the outside edge |
Insufficient overlap or drifting off the previous pass |
Increase overlap slightly and use a more consistent reference point |
|
Strip consistently behind one disc |
Worn, missing or incorrectly installed knives |
Inspect that disc and knife installation |
|
Ragged stems across most of the width |
Dull knives or inadequate cutter speed |
Check knives and verify specified PTO RPM |
|
Good cut in light crop but poor cut in heavy hay |
Ground speed too high for crop load |
Slow forward travel while maintaining PTO speed |
|
Scalped patches |
Cutter bar too low or field too uneven |
Raise cutting height and reduce speed over rough ground |
|
Hay bunching behind the mower |
Heavy/wet crop, poor discharge or excessive speed |
Slow down and check discharge area and mower setup |
|
Random uncut areas on turns |
Too little overlap or overly sharp turns |
Widen turns and establish adequate headland |
|
Increasing vibration |
Damaged, missing or uneven components |
Stop immediately and inspect according to the manual |
Do not attempt to diagnose any of these problems by climbing down while the discs are still spinning. Rotating cutter components can continue moving after PTO disengagement.
Can You Mow Hay When It Is Slightly Damp From Dew?
Light morning dew does not automatically mean a disc mower cannot physically cut the crop. But if the goal is dry hay, mid- to late-morning after the dew has dried is generally the more useful starting point in humid conditions.
The reason is drying time.
Mowing after dew evaporates allows the forage to begin losing moisture immediately and gives it most of the day's sunlight. University of Maryland Extension recommends mowing earlier in the day after dew is off for this reason.
There is also an important distinction here:
Wet forage at mowing and wet hay at baling are not the same issue.
A slightly damp standing crop may still be cut, although it can slow initial drying. Mold and heating concerns become especially important when hay is baled or stored at excessive moisture. The crop needs to reach a safe moisture condition appropriate to its bale type and storage system before baling.
Ground condition matters too. If the hay field is saturated enough that tractor tires are rutting the soil or the cutter bar is constantly collecting mud, postponing the job is usually more sensible than trying to save a few hours.
Wide Swath or Narrow Windrow: Which Helps Hay Dry Faster?
When your goal is rapid drying, a wide swath usually has the advantage.
A wide, loose layer exposes more leaves and stems to sunlight and air. University of Minnesota and University of Maryland guidance recommends a swath of roughly 70% or more of the mower's cutting width when the equipment allows it.
That means windrow formation should not be treated only as a question of what looks tidy behind the tractor.
A narrow, dense windrow can hold moisture. A wider swath creates more exposed surface area and lets the crop begin drying before the rake eventually gathers it for baling.
If your disc mower has adjustable swath wheels, forming shields, or similar discharge adjustments, set them according to the next stage of your hay system. With a mower conditioner, forming vanes or shields can also influence whether conditioned crop is laid broadly or gathered more narrowly.
Heavy hay deserves particular attention. If the mower lays a thick bunch of forage in the middle, the top may dry while material underneath remains wet.
Do You Need a Mower Conditioner?
Not every farm does.
If you cut a few acres of relatively light grass hay, have reliable drying weather, and already use a tedder or rake effectively, a plain disc mower can keep the hay system simpler and usually involves fewer conditioning components to maintain.
A mower conditioner becomes more attractive when you regularly deal with heavy hay, thick-stemmed forage, alfalfa, limited drying windows, or weather that makes every hour of curing time valuable.
The conditioner crimps, crushes, or abrades stems after the crop is cut, helping stem moisture escape. Research and Extension guidance consistently treats conditioning as a drying-management tool rather than a different method of cutting.
So the practical question is not “Is a mower conditioner better?”
It is:
Does faster drying justify the extra machine cost, horsepower requirement, maintenance and complexity on your farm?
For five acres of grass hay and generous weather windows, perhaps not. For alfalfa where rain is always threatening before baling, the calculation can look very different.
Timing the Hay Cut Matters as Much as Mower Setup
A clean cut does not automatically make high-quality feed.
Forage maturity at harvest has a major influence on eventual feed quality. As forage matures, stems generally become more fibrous and the quality-versus-yield trade-off shifts. Cutting at the correct stage helps capture the crop's existing feed value; mowing itself does not magically add nutrients.
That distinction matters when you're producing hay for livestock.
Likewise, mowing can help interrupt seed production in some weeds and stimulate forage regrowth, but repeated cutting cannot replace a complete fertility, weed-management and stand-management plan.
When rain is approaching, the “perfect” mechanical setup cannot rescue a poor haymaking window. Look at the entire period needed for mowing, drying, raking and baling—not merely whether the first morning is sunny.
After Mowing: Think Ahead to the Rake and Baler
The disc mower starts the harvest. It does not finish it.
Once the crop is down, your next job is to get moisture out while keeping leaves and useful forage in the field rather than losing them through excessive handling.
If hay is drying evenly in a broad swath, leave it exposed as long as your system and weather permit. If heavy hay is staying wet underneath, a tedder may help spread and loosen the crop. When it is time to rake, make a windrow that matches the pickup width and capacity of the baler rather than simply creating the biggest windrow the rake can form.
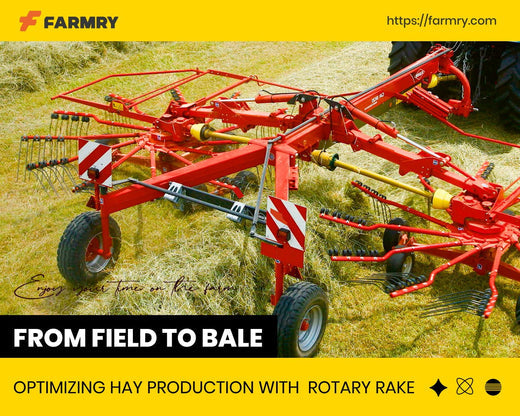
Farmry's rotary hay rake guide covers that next part of the process.
The point is to treat mower width, swath width, rake width and baler pickup as one system.
A farmer can save money buying the fastest mower available and then lose that time again if the crop is left in a dense strip that refuses to dry.
A Safety Rule Worth Repeating
A disc mower does its job with exposed cutting energy that must be taken seriously.
If you hit something, hear an unusual noise, see tangled material, discover a missed strip, or want to inspect a knife, stop forward motion and shut the machine down properly.
Disengaging the PTO alone is not enough before approaching the cutter bar. Penn State's current forage-harvesting safety guidance recommends shutting the tractor down, removing the key, and waiting until all moving components have completely stopped.
Keep mower guards and PTO shielding installed, keep people and livestock away from the operating area, and use the tractor and mower manuals for model-specific procedures.
Your hay can wait another minute. Rotating discs will not negotiate.
The Field Standard to Aim For
A well-set disc mower should leave you with four things: a clean cut, consistent stubble, very few missed strips, and forage positioned to dry efficiently.
If you're constantly compensating with more speed, lower cutting height, or repeated passes, something else probably needs adjustment.
Keep the knives sharp. Match cutting height to the forage. Run the specified PTO speed. Let crop density determine your ground speed. Use enough overlap to catch the outside edge without wasting cutting width. Give heavy hay room to breathe in the swath. And when the mower stops cutting cleanly, diagnose the cause rather than simply pushing the throttle harder.
That's how a disc mower becomes fast and efficient—and how the work you do during mowing makes raking, baling, feeding and storage easier later.
For farmers still deciding which mower width matches their tractor and acreage, compare Farmry's disc mower lineup with the hay mower sizing guide before choosing equipment based on cutting width alone.
Editorial note — Updated August 18, 2026: Product specifications and Farmry internal links were checked against current Farmry pages. Agronomic and safety recommendations were cross-checked against university Extension guidance. Tractor specifications, mower settings and operating procedures vary by model and field conditions; always follow the current tractor and mower operator manuals. No first-hand Farmry field test was provided for this article, so the draft does not claim that Farmry personally tested the methods described. Technical review by a Farmry product specialist is recommended before publication.